
Judging by the pile of camera bags on sale at my neighborhood Best Buy on Black Friday, many of you might find new digital Single-Lens Reflex (SLR) cameras under your tree/Yarmulke/Kwanzaa log.
Even though the first images these cameras might capture will probably be egg-nogged uncles and the action down at the kids' table, I have great reason to believe that this batch of holiday SLRs will see great things—concerts and museums, political figures and celebrities, sporting events and National Parks.
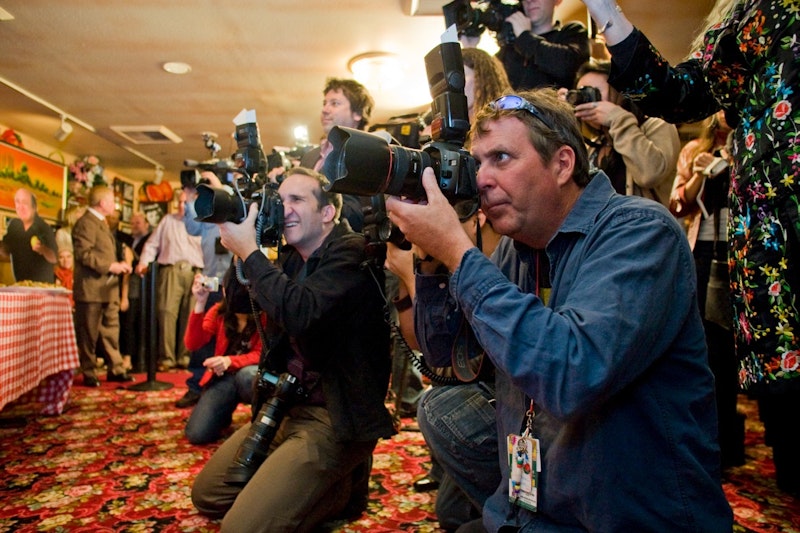
Along the way, these budding amateurs will probably run into people like me—professional photographers who shoot events to pay the bills. Photography has been democratized with the advent of digital imaging. Amateurs don't have to worry about film stock or developing costs. In basic terms, these new SLRs mean that amateurs now have equipment as good or better than many of the seasoned newspaper pros out there. Their images can be viewed and printed with the same quality in a corner drugstore kiosk or on the front page of The New York Times.
Needless to say, this pisses the old guys off. But there are a few tips you can use to separate yourself from the rest of the amateurs.
No Chimping
The ability to view your photos instantly is the most significant leap forward in photography since the invention of color processing. No more waiting at the developer—on a shoot, “one hour photo” is one hour too long. Before digital, pro film shooters used to snap review images with a Polaroid camera to check exposure, a process which now seems about as advanced as looking up a phone number in the Yellow Pages. Instant digital review made Polaroid imaging obsolete singlehandedly.
"Chimping" is the name that pro photogs have given to this instant review process. The origin of the word comes from the ape-like, "ooh ooh ooh," that photogs are said to utter when viewing their own work.
In theory, chimping is an indispensable tool for checking light levels and framing, but not when it comes at the expense of coverage. And it doesn't just affect amateurs. If you watch the sidelines of pro football or basketball games, you'll see gray-haired pro photogs chimping right after the big play, oblivious to the emotional drama unfolding right in front of them. Sometimes, capturing the reaction is far better than the action that preceded it, and it's far too easy to miss when you're transfixed by your own images.
Most cameras have a "review time" setting that should be kept at zero seconds. That way, every picture you take won't be sent instantly to the screen and you can get back to the action (or reaction) at hand.
Turn Off Your Flash
Back when disposable film cameras sat jammed in the back pockets of soccer moms everywhere, waiting to snap candids of the next great soccer star, nearly every photograph had to be taken with a flash. The inexpensive film used in these cameras wasn't very sensitive to light, so the built-in flash had to be used both indoors and outdoors.
Today, your digital SLR has no film. And yet I still see amateurs blinding their subjects with flash. Most young amateurs are frightened of terms like "aperture" and "shutter speed" and "exposure" and "ISO" and keep their cameras permanently set to Auto mode. I'm not going to nag you about making the switch to full Manual mode (except this once: make the switch to full Manual mode), but here’s a small tip:
The higher the ISO setting on your camera, the brighter your pictures will be. You can shoot in low light without having to worry about blurriness or flash. And unlike a film camera, your new digital SLR can change ISO quickly. Some cameras even have an "Expanded ISO" option hidden in their menus options, which can "boost" the ISO even higher for shooting in near-darkness.
Try it out. Your photos will begin to look like your memories of the event, no matter the lighting, and the subjects will thank you.
More Low Light Tips
The main difference between pros and amateurs as far as equipment goes is this ability to shoot with available light. If you like the look of non-flash photos and the ISO tip isn't quite cutting it, try these:
Pick up some faster glass. The kit lens that came with your camera likely has a variable aperture of f3.5-f4.5. You don't need to know what this means. Just remember this: the lower the number after the "f," the brighter your pictures can be. Usually, low-aperture zoom lenses are expensive (a Canon wide-angle zoom lens at f2.8, only a bit lower than your f3.5, retails for nearly $1300). But don’t worry: Canon and Nikon both sell a 50mm f1.8 lens that will let you shoot in far lower light for around $100. The only catch is that it isn't a zoom lens—if you want to get closer to your subject, you'll have to walk closer. But you might not have to use flash again. It's the perfect lens for shooting concerts.
Second, hold your camera correctly. This is the most physical difference between amateurs and pros and it's so simple to correct. When taking a vertical photo, make sure your right hand is the topmost hand and your left hand is supporting the camera from the bottom.
Why is this such a big deal? Think of architecture—two beams in the shape of a triangle supports more weight than two beams standing straight up. When you hold the camera incorrectly, with your right hand supporting the bottom, your arms are those two beams standing straight up. If you hold your arms in the shape of a triangle, with your right hand on top, your camera will be more stable and your pictures will be sharper at lower shutter speeds. How's that for a low-cost solution?
Keep Shooting
By far the best tip is the most intuitive. The more photos you take, the better you will be as a photographer. Digital photography makes this cheaper and easier.